Quantcast
Channel: Halloween Archives - Easy Peasy and Fun
Viewing all 74 articles
Browse latest View live

Paper Roll Monsters – Halloween Crafts for Kids

$
0
0

Need a fun and quick Halloween craft for kids to make? These pape roll monsters are insanely fun to make.
Paper Roll Monsters Halloween Craft for Kids


Toilet Paper Roll Monsters – Halloween Crafts for Kids

What you need

  • a bunch of paper rolls (toilet paper rolls – you can buy craft rolls if you don’t want to use these, kitchen towel paper rolls,….)
  • paper in assortment of colors – the more the merrier or paints in many colors
  • wiggly eyes stickers 
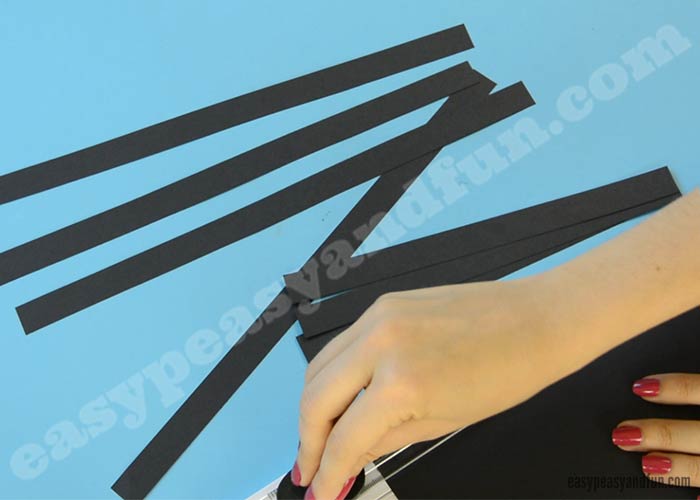
  • scissors (regular and decorative)
  • glue
  • markers


If you use store bought craft rolls, you can make this into a wonderful class project as each child can design their very own unique monster. The possibilities are endless! Just give them various supplies and watch them get creative.

step1

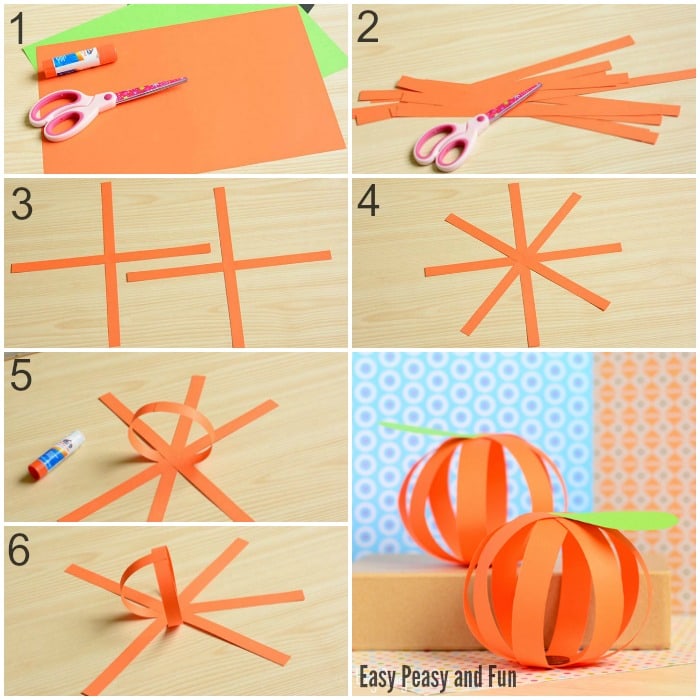
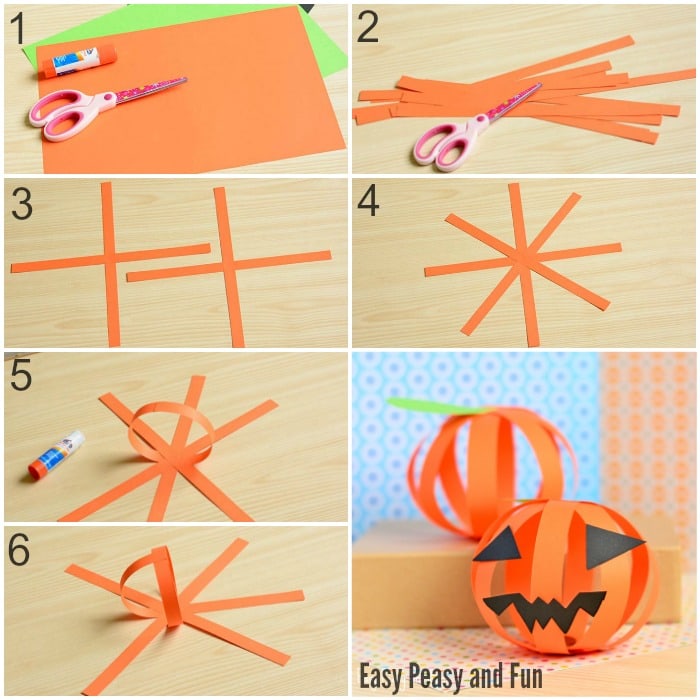
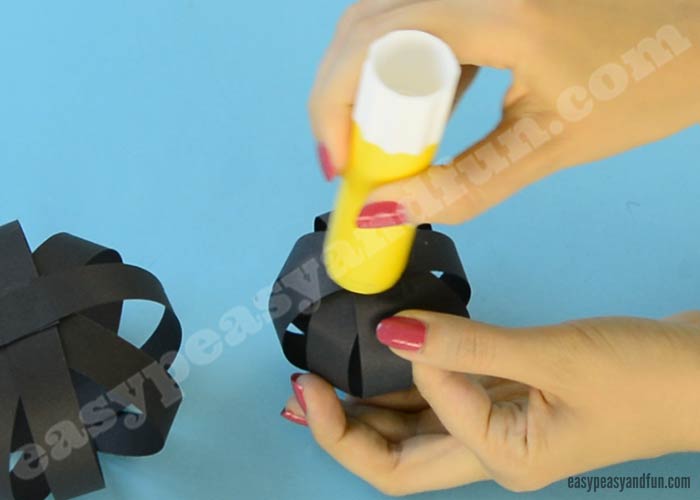
First, decorate you paper rolls, either by gluing the colored paper all around them or by painting them (let them dry before you continue if you paint them). The more colors the better.
step2

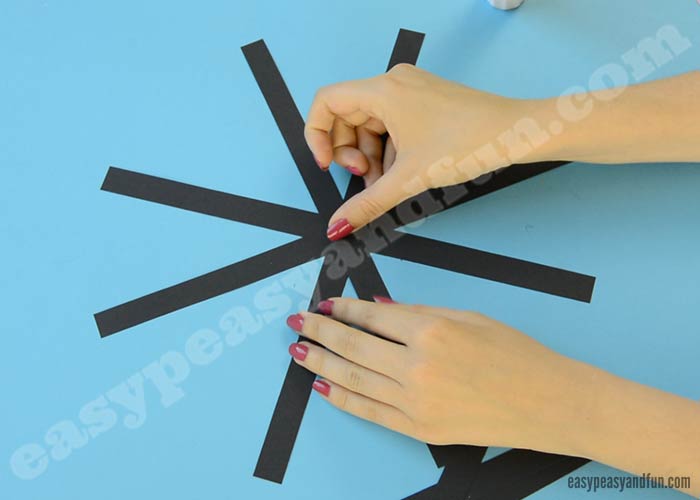
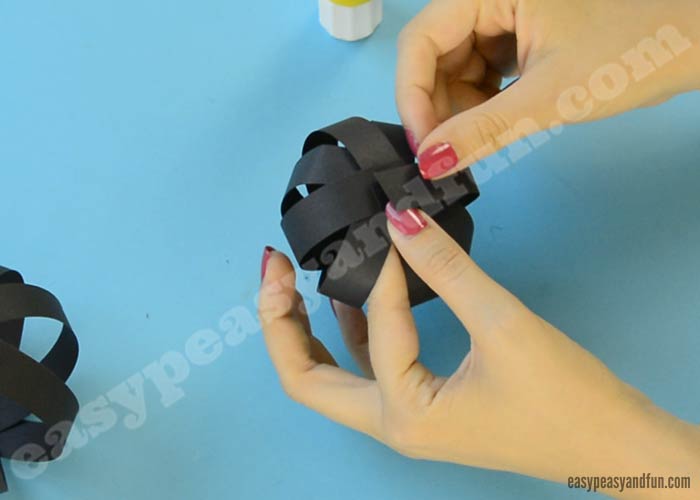
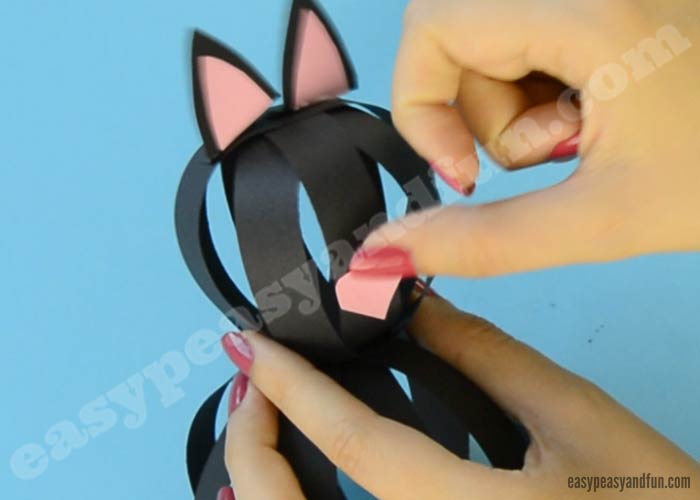
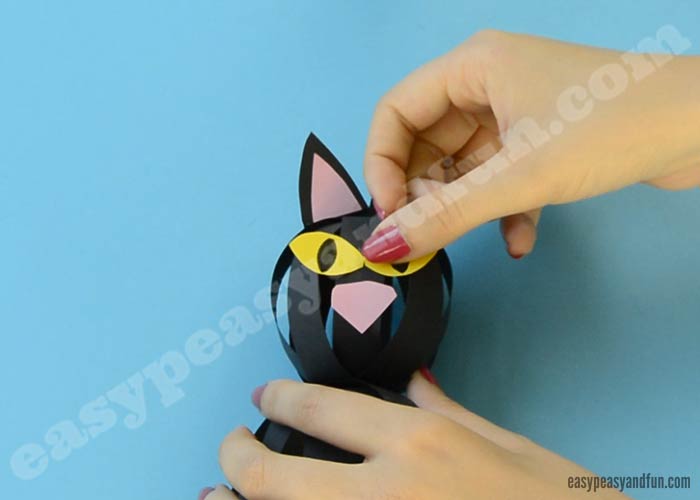
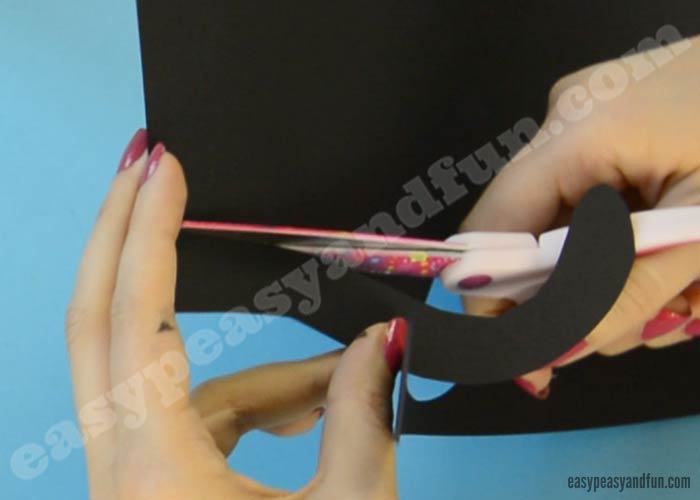
Once done, it’s time to get creative and decorate. You can do crazy hair with the help of decorative scissors, add eyes (wiggle eyes stickers are amazingly fun to use when making these paper roll monsters). Add horns, wings, fangs, tentacles, sticky tongues… The sky is the limit.

step3

Don’t forget to take a group photo of all the monsters you create. What a silly little bunch right?

More Cool Halloween Crafts for Kids

Black cat corner bookmark

Wooden Spoon Vampires Halloween Puppets

Painted Rock Monsters

More Paper Roll Craft Ideas for Kids

Frankenstein Toilet Paper Roll Craft

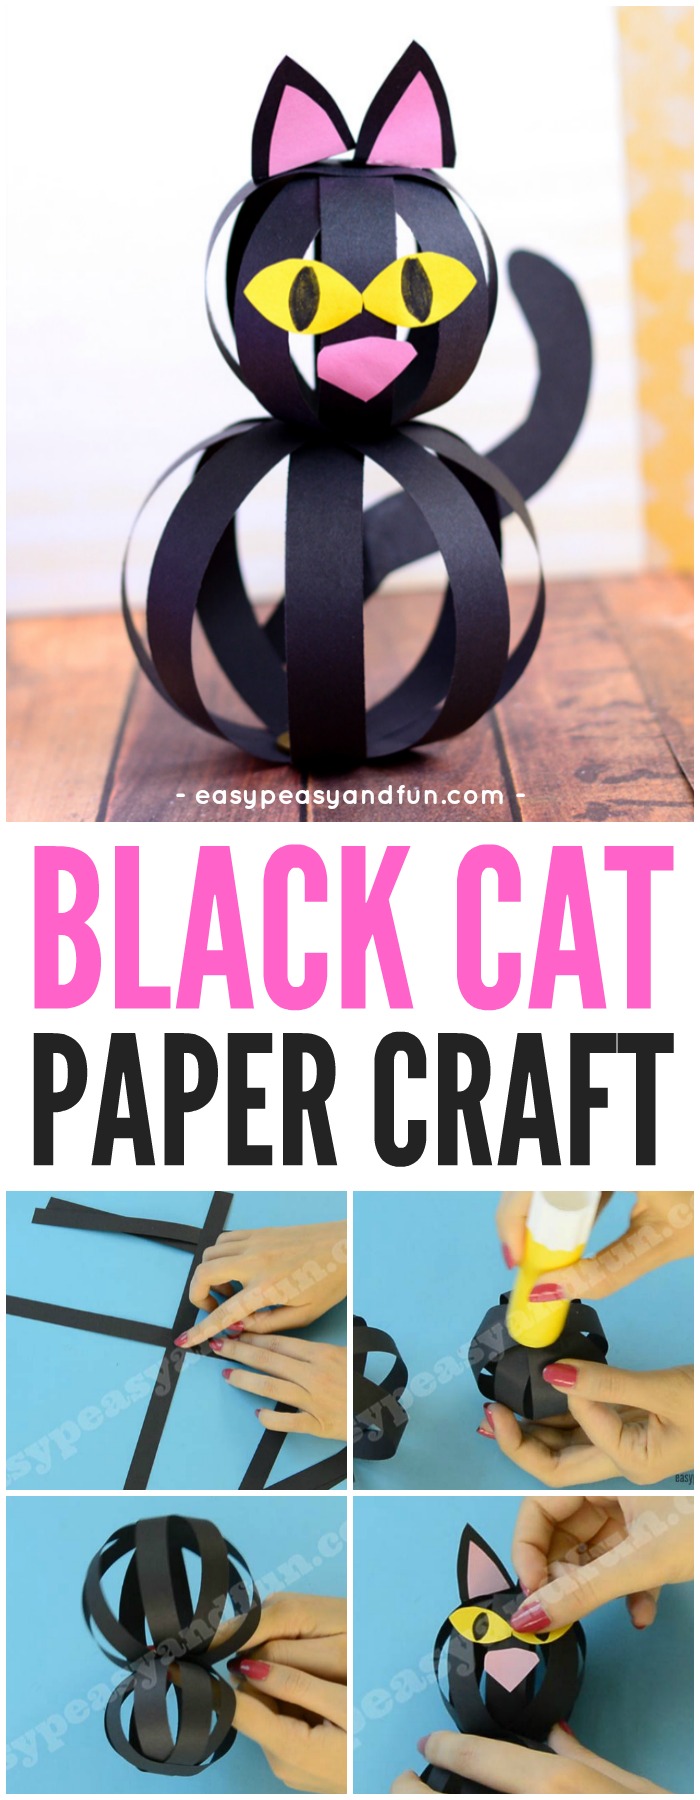
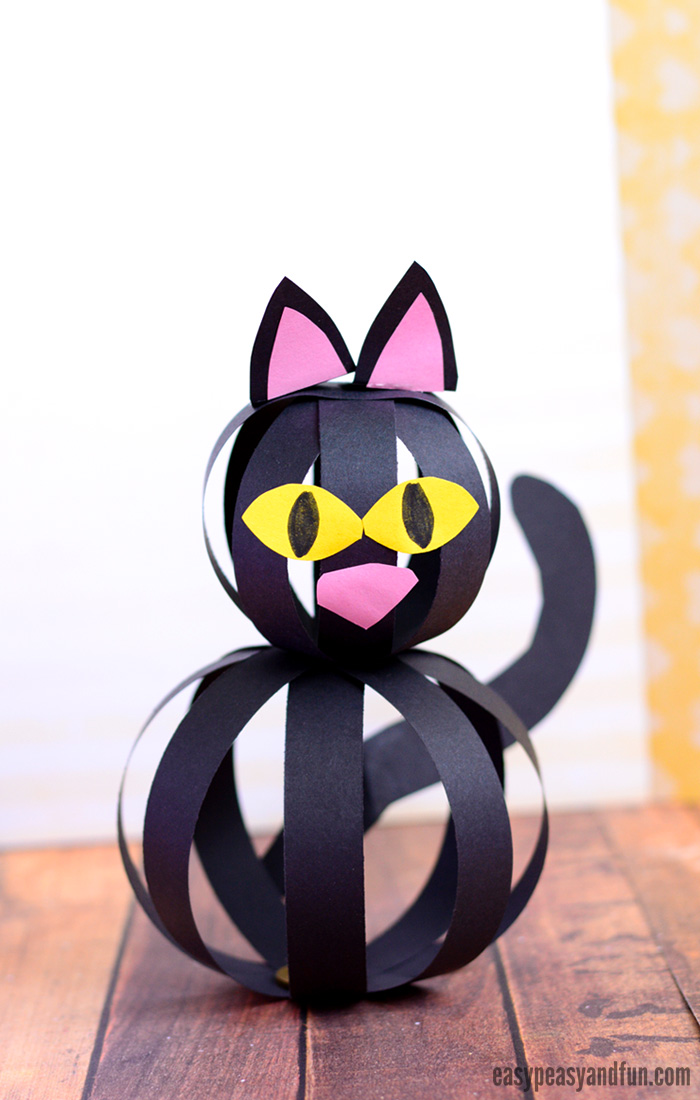
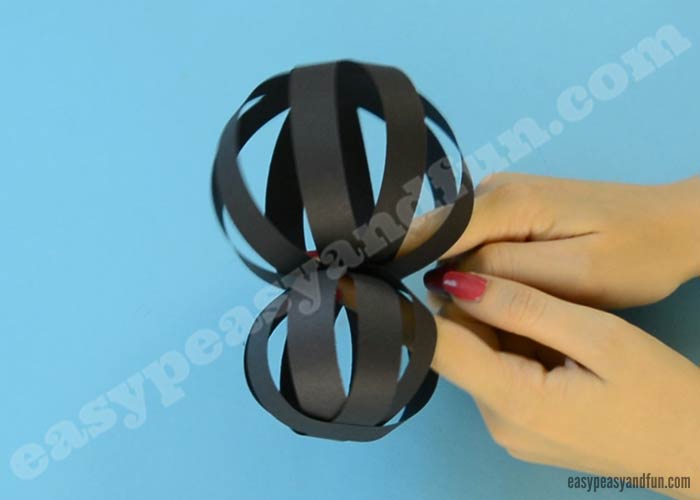
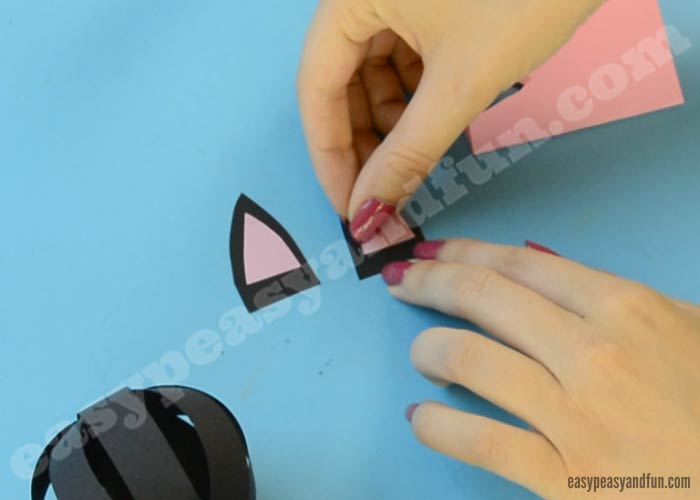
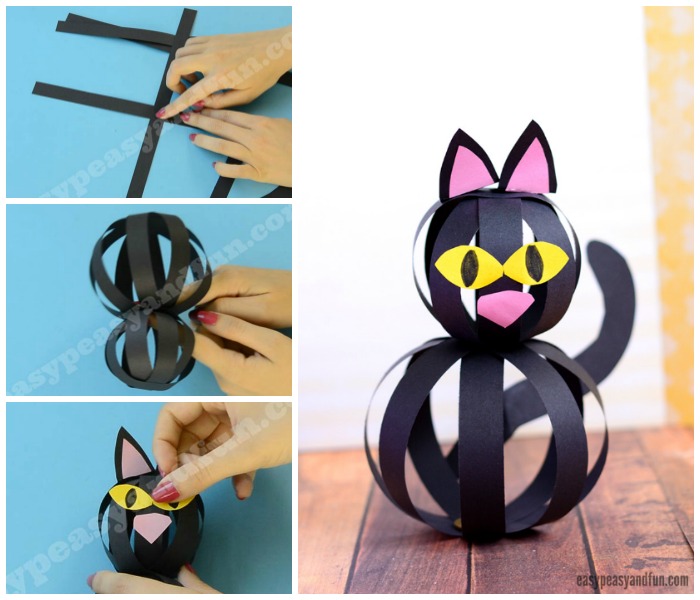
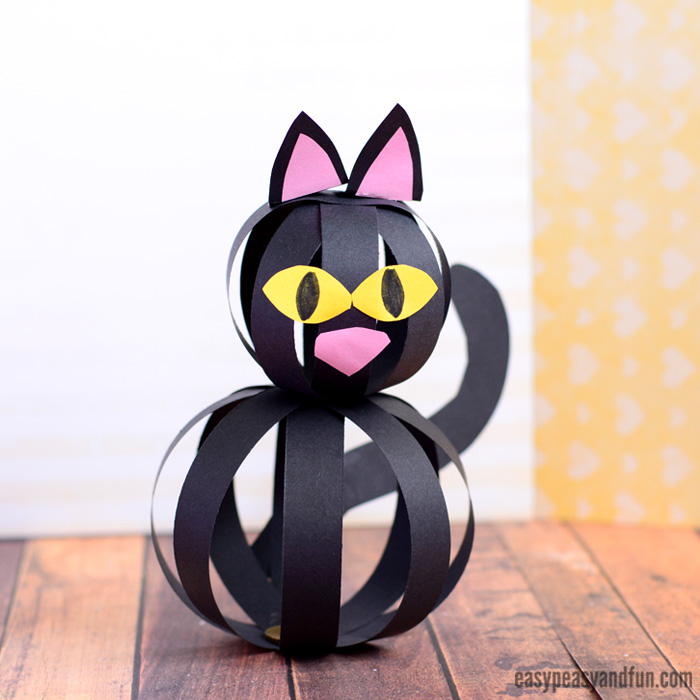
Black Cat Toilet Paper Roll Craft

Hedgehog Toilet Paper Roll Craft

Cute Paper Roll Monsters Halloween Craft for Kids

The post Paper Roll Monsters – Halloween Crafts for Kids appeared first on Easy Peasy and Fun.


Handprint Black Cat Craft

$
0
0

There is still enough time do plan a quick Halloween craft for kids – make an adorable (and spooky) handprint black cat craft.Handprint Black Cat Craft for Kids

*this post contains affiliate links*

Handprint Black Cat Craft

What you need:

step1

Trace your hand on the black construction paper with the pencil.

step2

Cut along the pencil line. Round up the palm as shown on the picture bellow. Also cut a cat head shape (you can trace a round object and draw two triangles to help you out)

step3

Let’s decorate our cats! Stick on wiggle eye stickers (no need to match the colors, make your cats funky! Aren’t these stickers the best?). Draw the details with the silver gel pen. Draw ears, mouth, snout and whiskers! Draw claws on all fingers except the thumb.

step4

Glue on the head. Have fun with your Handprint Black Cat Craft – such a cute keepsake.

More Black Cat Crafts to Make for Halloween

More Cool Halloween Projects to Make With Your Kids

Handprint Black Cat Craft

Cute Handprint Black Cat Craft for Kids

The post Handprint Black Cat Craft appeared first on Easy Peasy and Fun.

Paper Pumpkin Craft

$
0
0

We love it when crafts are quick and fun and that’s why this paper pumpkin craft is one of our favorites this season! Simple paper crafts are great for all ages, preschoolers and kids in kindergarten can practice their scissor skills while older kids can just have fun making a whole bunch of fall pumpkin decorations. Paper Pumpkin Craft for Kids

Paper Pumpkin Craft

What you need

  • orange paper (regular or construction paper)
  • green paper (same)
  • black construction paper (optional)
  • scissors
  • glue

step1

Cut orange paper into thin strips, you will need  4 per pumpkin (more or less depending on how you want your pumpkin to look and how wide your strips are)

step2

Glue two strips together, adding the glue in the middle, making a cross.

step3

Glue other two strips in the same manner and glue them on top of the first cross at a 45 degree angle – as you can see on the image below.

step4

Now take the bottom strip, join the ends and glue them together, making a circle.

step5

Take the second “bottom” strip, one end only, and glue it to the first circle. Repeat with all other strips until you get a nice orange ball.

step6

Cut the green leaf out of green paper and glue on top. If you want to display your paper pumpkin craft, we suggest you place a small pebble or a coin on the inside (on the bottom) so that it won’t wobble around or get moved around by the wind.

Paper Pumpkin CraftCute Paper Pumpkin Craft for Little Ones

Paper Pumpkin Craft – Jack o’Lantern

The procedure is the same here, only that you add a scary looking carving made from black paper.

Paper Jack o' Lantern Craft

Paper Jack o' Lantern Craft

The post Paper Pumpkin Craft appeared first on Easy Peasy and Fun.

Paper Roll Mummy Craft

$
0
0

There is still enough time to squeeze in a last minute Halloween craft and today we are making a paper roll mummy craft. This little fellow is spookaliciously cute and is ready to party with other paper roll monsters.Paper Roll Mummy Craft

*this post contains affiliate links*

As this one is fairly simple and quick to make it also makes for a great classroom craft (just use craft paper rolls you can pick up at some craft supply stores or use kitchen towel rolls instead of toilet paper rolls)

Paper Roll Mummy Craft

I am sharing this spooky-cute little project over at Blitsy, where you’ll find all the steps and materials needed to create your own paper roll scary mummy craft. I love working with wiggle eyes stickers as they are way more fun to work with than your regular googly eyes. I mean who does not love stickers?

Check out the whole how to tutorial for making this spooktacular paper roll mummy craft

The post Paper Roll Mummy Craft appeared first on Easy Peasy and Fun.

Spider Paper Hand Puppet Template

$
0
0

We have another addition in our bug puppets series, this time around we are making one of my least favourite (arachnophobiac here) creepy crawlies spiders with our spider paper hand puppet template.Spider Hand Puppet Paper Craft for Kids with Printable Template*this post contains affiliate links*

While I generally do not fear bugs, when it comes to this 8 legged creepy crawlie I am terrified at the sight of them. And I swear they know it as they do have a tendency to go straight at me. My rational inner voice tries to fill me up with reason, as we live in an are where there are 0 poisonous or dangerous spiders, but the irrational phobia always wins.

It is one of the fears I hope I will overcome someday (I did make progress from childhood where I couldn’t even touch a picture of a spider, but now I can tolerate incy wincy ones – like micro ones). I do not hate spiders, I do think they are cool… From a far, very, very far.

But this adorable spider paper hand puppet is completely different… And completely scare free! It’s silly legs will wiggle around as you move it.

Ready to make one? Go freestyle of use our template (you can find it at the end of this tutorial) and let the creepy crawly fun begin!

Spider Paper Hand Puppet Template Craft for Kids

How to Make use Spider Paper Hand Puppet Template

What you need

  • our printable template (you can grab it at the end of this post)
  • colorful construction paper or markers
  • scissors
  • glue
  • printer
  • paper

Optional wiggle eye stickers and glitter, as usual.

Watch The Video Tutorial

Or Follow these Step by Step Instructions On How To Make This Spider Hand Puppet with Printable Template

Print out or spider puppet template. Any type of paper is fine (we do recommend heavier paper if you are going to color it with markers though).

If you will be coloring in your spider puppet we recommend you color it before cutting, as it will make things easier.

Cut out the spider parts.

Trace the body shape onto black paper (construction paper is best).

Cut out the body.

Trace and cut legs out of gray paper.

Fold the legs – zig, zag accordion fold – this will make them look funkier.

Glue the legs on the bottom side of the body.

Totally optional, but it does add to the scary factor of this spider – you can add a little red star cross shape or any other spidery decorations.

Add the strap for the hand and you are done.

Spider Paper Hand Puppet with Printable Template

Spider Paper Hand Puppet Template Craft for Kids to MakeGet the Spider Paper Hand Puppet Template Here

Grab the template here: Spider Hand Puppet

I do hope you and your kids have enjoyed this craft idea and that you will snap and share a photo (or a video with us) on any of our social media channels or email (tag on IG @easypeasyandfun or #easypeasyandfun).

Have fun

The post Spider Paper Hand Puppet Template appeared first on Easy Peasy and Fun.

Colorful Paper Plate Owl Craft Idea

$
0
0

It’s owl time! We love owl crafts and this idea for making this colorful paper plate owl craft might just be our favorite as of jet.

This one will make a great classroom craft for fall or for the spookiest time of the year.

Colorful Paper Plate Owl Craft for Kids. Fun paper plate crafts for kids.*this post contains affiliate links*

We love to give our crafts some dimensions, and room for kids to get a bit more creative so we though long and hard on how to make a paper plate owl craft a bit… Different.

You loved our paper plate rainbow fish (and we certainly did too) and as paper circles felt like they would work pretty well as feathers we decided to give it a go. And we love it.

Our owl loves to rock her pastel feathers, but it can be done in many different color schemes (or just using one color). Not only does it look great, handling a punch and punching circles is always a fun process for kids to do. And gluing circles on the owl craft will give your little ones a good fine motor exercise.

Ready to get crafty? Let’s make our owl!

How to Make Colorful Paper Plate Owl

What you need:

  • two paper plates (one bigger than the other – if not you can trim one to make it smaller, two that are the same size will work out just as well too)
  • brown paint
  • paint brush (we do love sponge brushes)
  • colorful print paper for feathers
  • orange paper for beak and legs
  • white paper for eye
  • marker
  • circle punch
  • scallop circle punch (optional)
  • glue
  • scissors

If you want to make your owl even fancier some glitter is always welcome (when I say glitter I mean glitter glue – life saviour, well saviour from glitter explosions).

Watch The Video Tutorial

Or Follow these Step by Step Instructions On How To Make This Colorful Paper Plate Owl

Paint the paper plates brown. Let the paint dry before you continue.

Cut a triangle out of orange paper (beak) and glue it on the paper plate.

Using a scallop circle punch, make the eyes.

You can naturally just go with the regular circles, but we thing scallop edge gives it a more owly look.

Finish up the eyes and glue them on the paper plate.

Start punching circles! You’ll need quite a few!

Fold the circles in half.

Start gluing the circles on the paper plate. You can start from the bottom or from the top.

Work your way to about the middle of the paper plate (when you are happy with how the feathers look).

Cut out the legs out of orange paper.

Glue them on the back of the paper plate.

Cut the other paper plate in half.

Glue the paper plate halves on the sides of your paper plate owl to make the wings.

All done, you have one funky colorful paper plate owl craft to play with.

Colorful Paper Plate Owl Craft for Kids

Colorful Paper Plate Owl Craft

The post Colorful Paper Plate Owl Craft Idea appeared first on Easy Peasy and Fun.

Paper Cat Craft Template

$
0
0

We do love a good cat craft idea here at Easy Peasy and Fun! Grab this paper cat craft template and make an army of little kitty cats. Adorable.

This craft idea is perfect for the spooky time of the year, but as cats are awesome all year round this one will be a fun project any time!

Cute Paper Cat Craft Template for Kids *this post contains affiliate links*

As far as crafting “seasons” go, fall is one of my favorites as there is a nice variety of themes you can do. With Halloween near, black cat craft ideas certainly are on the menu and as a cat person, I couldn’t be more excited.

We are kicking off this years cat craft ideas with a simple and spooky cute cone paper cat that you can do with or without our printable cat template.

We made the template in a way that you can either use it as a color in template or as a stencil to make cats of colored paper (especially black cats!). Your kids or you can decorate the cats in any way they want too (we would love to see a glitter cat – honestly cat eyes with some glitter would look amazing now that we think of it).

If you are planning your Halloween craft ideas, this one is certainly one to add to your list – both as a classroom craft or as one to make at home with your kids (or by yourself ;).

Ready to make one or ten? Let’s make them together!

Paper Cat Craft Template for Kids

How To Make the Cat with our Paper Cat Craft Template

What you need:

  • our paper cat craft template (you can grab it at the end of this tutorial)
  • paper – white printer paper if you will color it in and additional color papers if you’ll be using the template as a stencil
  • printer
  • markers or other coloring supplies if you will color in the template
  • scissors
  • glue

Additional decorations always welcome: glitter, pipe cleaners for whiskers…

Watch The Video Tutorial

Or Follow these Step by Step Instructions

Print out the paper cat craft template (you can grab it at the end of this tutorial). If you will be coloring the template, we recommend you color it first.

Cut out all the template parts.

*If using as the stencil, trace around the parts on colored paper and cut the parts out.*

Take the head part and apply glue on the field marked with “glue”.

Roll and glue together. Allow the glue to dry.

There is a cross marked with dash lines on the head part. Cut along the dashed lines.

Glue on the ears on the head (fold along the dashed lines).

Glue them on the dashed lines squares on the head.

Take the body part and make a cone out of it. Apply glue on the area marked with “glue”, roll together in a cone and allow the glue to set.

Apply glue on the head area, on the dashed cross area.

Place the head on the cone and push it down – the glue will set it in place.

Now it’s time to do some cat decorating!

Stick the cat tail on the back of your cone cat.

And the little legs!

All done! You have made a wonderful cat paper craft! I hope you will enjoy using our paper cat craft template over and over again, creating all kinds of wonderful cats.

Paper Cat Template Craft

Paper Cat Craft Template

Get the Paper Cat Craft Template

Click here to get the template: Paper Cat Craft Template

The post Paper Cat Craft Template appeared first on Easy Peasy and Fun.

Simple Owl Craft Template

$
0
0

Raise your hand if you love owls! Raise both hands if you like colorful owls!

We have a fun owl craft idea prepared for you, print our simple owl craft template and make a pair of lovely hugging owls.

Simple Owl Craft Template for Kids*this post contains affiliate links*

Owls are such a fun crafty project both for fall and Halloween. While you’ll normally find them in brownish or white tones in the nature, when it comes to crafts they can be made in all the colors of the rainbow – just like we colored ours.

This simple paper craft is more about the coloring than it is about crafting and is, because of that, an insanely easy project to make. There is some cutting involved, which makes for a good scissor skills practice.

As there is a moma own (or papa owl) and a baby owl to be made with our printable template this one is a great mother daughter/son or father daughter/son project to make.

Ready to breather life and colors into your set of owls? Grab our owl craft template (you can find it at the very end of this tutorial), color and have fun.

Let’s do it!

Simple Owl Craft Template

How to use Our Simple Owl Craft Template

What you need:

  • our printable owl craft template (you can grab it at the end of the tutorial)
  • printer
  • paper (we used regular print paper, heavier print paper would be even better)
  • something to color in the template (we used ink pads and stamps – super cool and colorful)
  • scissors
  • glue

Glitter always welcome too!

Watch The Video Tutorial

Or Follow these Step by Step Instructions on How to Make These Simple Paper Owls

Print our template. We printed ours on regular print paper.

Color in the owls.

We had lots of fun coloring it with ink pads. The colors are so bright and fun!

The details around eyes we colored with a marker.

Cut out the template.

Flip it over and also color the backside.

Add a smaller amount of glue on one end of the wing.

Glue the wings together (make an owl ring).

Repeat with the other owl.

All done, easy peasy! You can place one owl into the other, making them hug each other. How cute is that!

Cute Owl Craft Template

Simple Owl Craft Template for KidsGrab the Simple Owl Craft Template Here

Click to open – Template for Simple Owl Craft

The post Simple Owl Craft Template appeared first on Easy Peasy and Fun.


Mason Jar Mummy

$
0
0

This mason jar mummy is a fun Halloween crafty arty idea both for kids and kids at heart! Not only is the process fun, it can be used as a wonderful DIY Halloween decoration at your home or in your classroom.

Cute Mason Jar Mummy Halloween Craft for Kids

*this post contains affiliate links*

We do love Halloween! It’s that special time of the year that is both mysterious and fun. More importantly it’s the time of the year where you can really let your cretivity go loose! There are all kinds of awesome Halloween craft ideas you can do with your kids – be it just for fun or to turn your home or your classroom into a spooly mansion.

Halloween mason jars are a great project to do, as they are fun to make, there are many possibilities and they make the most wonderful DIY decoration.

You can pop in a tea light and make them even cooler. They can easily be used as pencil holders, shelf decorations or as a table centerpiece that will hold flowers, spooky decorations, snacks, straws…

You can also use these as drinking glasses (just don’t paint them on the inside then, and avoid painting the edge where the lid should be). I can’t think of anyone who wouldn’t like to drink out of a mummy mason jar!

Cute Mason Jar Mummy Craft for Kids

Ready to make your own decorated mason jar? Let make one!

How to Make a Mason Jar Mummy Craft

What you need:

  • mason jar
  • black multi purpose paint
  • paint brush
  • paper first aid tape
  • googly eyes
  • glue (glue gun works best – you can use low temp one wit the kids, regular glue will do OK too)

And any other spooky details you can think of ;).

Ready to make your mason jar mummy? Let’s get crafty!

Protect the working area with a few pieces of scrap paper, especially if young ones will be getting crafty.

Paint the outside (or the inside) of your mason jar black. Depending on the paint you might need to do more than one layer.

Allow the paint to dry – some take minutes, others might need to be let to dry overnight – act according to instructions on the paint itself.

First we need to add a pair of googly eyes (while these look the best/silliest you can also use paper circles with eyes drawn in). Carefully glue two googly eyes towards the top third of the mason jar. Wait a bit for the glue to set.

Stick your paper tape onto the bottom back of the jar and begin wrapping and overlapping the tape around the jar to look like a mummy.

All done! You have made yourself your very own wonderful spooky cool looking Halloween mason jar mummy and it’s all ready to be filled with all kinds of treats or be used as a decoration (remember – tea light that will make it glow).

Mason Jar Mummy Craft for Kids

Such an easy Halloween mason jar craft isn’t it! And super cool one too!

Cute Mason Jar Mummy Craft

The post Mason Jar Mummy appeared first on Easy Peasy and Fun.

Super Simple Black Cat Paper Craft

$
0
0

We sure do love simple crafts, and when it comes to simple, nothing beats crafts made out of paper! This black cat paper craft is super easy to make, your kids will have one in no time and we are pretty sure it will be hard for them to stop at just one!

This black cat craft is great to do around Halloween, but you can naturally make cat crafts all year round.

Black Cat Simple Paper Craft for Kids. Fun Halloween Craft for Kids too.*This post contains affiliate links*

We do love a good halloween craft for kids to make, well and one that grown ups can enjoy too and this Black Cat Paper Craft certainly fits the description.

It’s insanely easy to make but still looks absolutely cool! You can make a “regular” tail, but if you want a spooky cool craft for Halloween we totally recommend you make the tail as we did, in a full fledged fluffed up angry cat tail.

You can make these with regular print paper or use construction paper.

If you will be using regular print paper, we do recommend you glue the cat onto another piece of paper (make a stand) as it won’t be standing on it’s own – well at least not for long. A cat made out of construction paper will be able to stand on it’s own.

Ready to make your own black cat! Let’s get crafty!

Black Cat Paper Craft for Kids. Fun Helloween craft for kids too.

How to Make a Super Simple Black Cat Paper Craft

What you need:

  • black paper (construction paper or a sheet of regular black print paper, but if you choose the later you will also need to make a paper base to glue the cat on for it to stand)
  • pink paper for the nose
  • yellow paper for the eyes
  • black marker
  • glue
  • scissors

You could also make a tabby, white kitty, black and white cat… Rainbow cat even!

Watch the Video Tutorial

Or Follow These Step by Step Instructions with Tips and Tricks on How to Make This Black Cat Paper Craft

Fold the sheet of black paper. You can fold it in half or as we did (in half ish).

Cut any “excess” and put aside, we will use this part to make some body parts.

If you folded your paper in half, you won’t have this excess paper, so you will utilise other “extra” paper to mae certain body parts.
Cut a third of the paper, set aside.

No need to be exact when making this. You can always use another sheet of paper.

From the larger piece of paper, cut out the U shape (opposite of the fold).

This will make the body of the Black Cat Paper Craft.

You can trim it a bit on the edges to make it look nicer (totally optional).

Fold the feet so the kitty will be able to stand.

Cut the tail.

Glue the tail on the body.

Cut the head and decorate it.

We cut the half circle out of the folded paper (so a circle folded in half).

Glue on two ears.

And eyes and nose.

Glue the head on the body.

We hope you enjoyed making your Black Cat Paper Craft.

Black Cat Simple Paper Craft

Black Cat Paper Craft for Kids

The post Super Simple Black Cat Paper Craft appeared first on Easy Peasy and Fun.

Cat Craft with Paper Strips

$
0
0

Who loves Halloween? We do! And we have another wonderful craft idea to share with you – lets make a cat craft with paper strips together!

We sure do love crafting with construction paper strips. Frugal and insanely fun.

Black Cat Craft for Kids with Paper Strips*this post contains affiliate links*

Cat lovers will love this craft idea all year round, but make a black one and this will be a great Halloween craft to make with your kids. Me? I am a cataholic! I could do cat crafts all year round without a doubt.

This one can be used both as a Halloween garland decoration – just hang them on the thread or they can stand on their own if you add a coin or a pebble inside or make a base out of paper.

We really enjoy making these paper strip crafts (we have a ton of ideas around the website already and keep on adding more, it’s amazing how many wonderful things you can make from simple paper strips).

Ready to make your very own black cat?


Halloween Cat Craft with Paper Strips

Cat Craft with Paper Strips

What you need:

  • black paper (regular print paper or construction paper)
  • scissors or paper trimmer (we suggest a trimmer)
  • a little bit of yellow paper
  • a little bit of pink paper
  • glue

Other color combinations are welcome too.

Watch The Video Tutorial

Or Follow these Step by Step Instructions

We are working with 2 letter sized (A4) sheets of paper.

You will need to cut 4 short strips and 4 longer strips of paper (the strips are about an finger wide, younger kids will make wider, older kids can make thinner and even use more strips).

For the long strips we made them by cutting the letter/A4 sized paper across it’s length.

Shorter ones we did by cutting the letter/A4 sized paper across it’s width.

Align the short strips and the long strips (separately). Gently bend in half to mark the middle of the strips (you can also do one by one).

Start with one length. Glue the two strips one on top of the other (crossing in the middle – at the fold where you bent them).

Glue on other two to form the “snowflake” shape.

Now loop the strips and glue the ends together.

Loop and glue all the strips, a paper ball will form.

Repeat with the other ball.

Let the glue dry before you continue.

Apply a generous amount of glue at the bottom of one of the balls.

Stick the two paper balls together.

You will have to hold them together for a while to allow the glue some time to set.

Decorate!

Cut two triangle shapes for the ears. You can decorate them with pink paper.

Fold into a L shape (pointy end on top), apply glue and glue on top of the smaller ball.

Cut a small pink triangle for the nose and glue it onto the paper ball.

Cut two eyes out of yellow construction paper, draw in eye details and glue on the head.

You can also add whiskers.

Cut tail out of black paper.

Glue it on the back of the larger paper ball.

If you want your Cat Craft with Paper Strips to stand on it’s own, also cut a round base and glue it on the bottom of the large paper ball (alternatively you can also glue a coin inside).

Black Cat Craft with Paper Strips

Cat Craft for Kids with Paper Strips

The post Cat Craft with Paper Strips appeared first on Easy Peasy and Fun.

Halloween Torn Paper Art Ideas

$
0
0

Who is ready to make some Halloween torn paper art?

We have some wonderful collage art ideas to share with you to get you inspired for a fun filled Halloween creative crafting session.

Halloween Torn Paper Art Ideas for Kids*this post contains affiliate links*

Halloween Torn Paper Art Ideas

Let’s rip some paper and get crafty! This is such a low prep activity that can be done at any time.

Paper mosaics trully are a wonderful art project for kids, as they will each be able to create their own unique piece and with a holiday such as Halloween there are many wonderful spooky and cute objects they can make.

All that you need in order to make torn paper art is a few sheets of paper in different colors (the more colors available the more creative they will be), glue and possibly a pencil or a chalk to make an outline for your final creation.

See easy peasy!

Need a few ideas? Here are some of the ghoulishly cute and spooky Halloween torn paper art ideas we created for you:

Torn Paper Ghost Art

Black paper is best for the base, although other colors will work well too. You need a sheet of white paper for the ghost too. Additional black sheet can be used as you can either leave the eyes “blank” or make them with ripped black paper.

If working on black paper and you want to draw the ghost first, we recommend using a white chalk.

Tear white paper into small bits of different sizes and glue it onto the black paper.

Ghost Torn Paper ArtEasy Peasy Bat Paper Collage

For a bat we choose a sheet of orange paper for the base, a sheet of black paper for the bad and some white paper for the eyes.

We drew the bat with white chalk. First we drew an oval for the body and a circle on top of the oval for the head. Two pointy triangles were drawn for the ears. Last we drew wings on both sides.

Tear the black paper into small bits and fill the bat shape. Rip two small pieces of white paper and glue them in the place for the eyes.

Bat Torn Paper ArtSpider Halloween Torn Paper Art

We made this one on light pink base. You will need black paper and some white paper and just a bit of red paper.

We drew the spider with a black chalk. First we drew a circle. We then drew 8 lines – 4 lines on each side of the circle. We filled everything with pieces of black paper.

Add some finishing touches – eyes, mouth and a little bit of spider’s web.

Spider Torn Paper ArtPumpkin or Jack o’Lantern

We made this one on the black paper. You will need a sheet of orange paper, some black paper and a bit of green paper.

Pumpkin Torn Paper ArtBlack Cat Halloween Torn Paper Art Idea

We can’t make Halloween art or crafts without a cat. We made it on the orange base. You will need a sheet of black paper, a bit of yellow paper and a bit of pink.

We drew the cat outline with a chalk. First we drew a triangle from the middle of the sheet of paper (roughly) to the bottom. We drew a circle with it’s center at the top of the triangle we previously drew, and two triangles on top for ears..

Black Cat Torn Paper ArtWitch

We though it would be fun to include a witch too! This one was a “freehand” spur of the moment creation.

Witch Torn Paper ArtCandy Corn Ripped Paper Art Idea

We drew the outline with white chalk and filled it with white, yellow and orange torn paper.

Candy Corn Torn Paper Art

There are many more wonderful possibilities and we will be adding more as we create them. Some of the ideas you could also create include: hounted house, spooky tree, skeleton, vampire, spider’s web…Halloween Torn Paper Art Craft Ideas for Kids

The post Halloween Torn Paper Art Ideas appeared first on Easy Peasy and Fun.

Black Cat Paper Plate Craft

$
0
0

We have another wonderful paper plate project to share with you – we are making a black cat paper plate craft (perfect for younger kids). Last year we shared a funky looking swirly cat – but that one required a bit more skill, so this year we are making an easier version for preschool or […]

The post Black Cat Paper Plate Craft appeared first on Easy Peasy and Fun.

Printable Monsters Mix and Match Cubes

$
0
0

We have a brand new set of mix and match cubes to share with you.  Let’s have some fun with mixing and matching with this set of Printable Monsters Mix and Match Cubes. Kids can color their heads, bodies, and feet with their favorite colors or just print and play with the pre-colored monster blocks. […]

The post Printable Monsters Mix and Match Cubes appeared first on Easy Peasy and Fun.

Paper Ball Black Cat

$
0
0

We’re back with another extremely easy (and cute) paper craft for Halloween. This paper ball black cat isn’t just cute, it can be used as a toy or as an ornament to hang anywhere in your home. *this post contains affiliate links* Another black cat craft has found it’s forever home on Easy Peasy and […]

The post Paper Ball Black Cat appeared first on Easy Peasy and Fun.


Movable Owl Paper Doll

$
0
0

Print our template and make your very own movable owl paper doll. What a hoot! Glue it onto a craft stick, add some string (we’ll show you exactly how it’s done) and you’ll be flapping those wings in no time. *this post contains affiliate links* Owls sure are wonderful creatures, and a great crafting theme […]

The post Movable Owl Paper Doll appeared first on Easy Peasy and Fun.

Printable Monster Envelopes

$
0
0

Bring a bit of silly to your letters – send them in style with these printable monster envelopes! Perfect to send out your Halloween party invitations or just to make someone’s day. We have one colored and one to color, so your kids can personalize them however they see fit. *this post contains affiliate links* […]

The post Printable Monster Envelopes appeared first on Easy Peasy and Fun.

DIY Scarecrow Mason Jar – Fall Mason Jar Crafts

$
0
0

We are really excited to share this wonderful scarecrow mason jar craft idea with you (a great fall mason jar project to make), as it’s a wonderful project to make as well as a fancy homemade fall decor. *this post contains affiliate links* Want to make some fall mason jar crafts? There’s not a project […]

The post DIY Scarecrow Mason Jar – Fall Mason Jar Crafts appeared first on Easy Peasy and Fun.

Halloween Monsters Paper Rings

$
0
0

We have a wonderful printable Halloween treat for you, are you ready to have your hands embellished with these spookalicious printable Halloween monsters paper rings? We sure are! These are great to use at home or classroom Halloween party or just for the fun of it. *this post contains affiliate links* We love all things […]

The post Halloween Monsters Paper Rings appeared first on Easy Peasy and Fun.

Paper Cone Monster Craft

$
0
0

Time to make a paper cone monster craft! Print out our template, bring out your coloring supplies or colored paper and make super silly monsters. *this post contains affiliate links* We are so happy to add these silly cone monsters to our collection of Halloween crafts for kids, these are fun to make and fun […]

The post Paper Cone Monster Craft appeared first on Easy Peasy and Fun.

Viewing all 74 articles
Browse latest View live


Latest Images